php artisan make:migrationは、作成・変更するテーブルの列などを定義するクラスファイルを生成し、
php artian migrateは、マイグレーションファイルの定義に基づいてテーブルを作成・変更します。
サンプル
php artisan make:migrate
php artisan make:migration sample_table上記コマンドを実行すると、

作成先のファイルパスが出力され、ファイル名の始めに作成日(YYYY_MM_DD_HHmmss)が付け加えられた状態でマイグレーションファイルが生成されます。
生成されたファイル↓
<?php

use Illuminate\Database\Migrations\Migration;
use Illuminate\Database\Schema\Blueprint;
use Illuminate\Support\Facades\Schema;

return new class extends Migration
{
    /**
     * Run the migrations.
     */
    public function up(): void
    {
        //
    }

    /**
     * Reverse the migrations.
     */
    public function down(): void
    {
        //
    }
};
upメソッドは、マイグレーションが適用される際に実行される処理で、
downメソッドは、マイグレーションが取り消される際に実行される処理です。
upメソッドにテーブルを作成するのか、テーブル構造を変更するのか、
処理を書いていくのですが、用途に合わせてオプションをつけたほうが楽ですので、
オプションにてサンプルを載せます。
オプション
–create
テーブル作成のためのマイグレーションファイル生成のオプションです。
php artisan make:migration create_sample_table --create=sample_table–createの後に作成したいテーブル名を明記します。
コマンドを実行すると、/database/migrations/以下に
YYYY_MM_DD_HHmmss_create_sample_table.phpが生成されます。
生成されたファイル↓
<?php

use Illuminate\Database\Migrations\Migration;
use Illuminate\Database\Schema\Blueprint;
use Illuminate\Support\Facades\Schema;

return new class extends Migration
{
    /**
     * Run the migrations.
     */
    public function up(): void
    {
        Schema::create('sample_table', function (Blueprint $table) {
            $table->id();
            $table->timestamps();
        });
    }

    /**
     * Reverse the migrations.
     */
    public function down(): void
    {
        Schema::dropIfExists('sample_table');
    }
};
このようにcreateオプションをつけると、
始めから、テーブル作成のためのロジックと、削除のためのロジックを書いた形で
マイグレーションファイルを生成してくれます。
あとは、カラムの部分を微調整するのみです。
微調整後↓
<?php

use Illuminate\Database\Migrations\Migration;
use Illuminate\Database\Schema\Blueprint;
use Illuminate\Support\Facades\Schema;

return new class extends Migration
{
    /**
     * Run the migrations.
     */
    public function up(): void
    {
        Schema::create('sample_table', function (Blueprint $table) {
            $table->id()->autoIncrement();
            $table->string('name', 100)->comment('名前');
            $table->integer('age')->comment('年齢')->nullable();
            $table->string('email', 255)->unique()->comment('メールアドレス')->nullable();
            $table->timestamps();
        });
    }

    /**
     * Reverse the migrations.
     */
    public function down(): void
    {
        Schema::dropIfExists('sample_table');
    }
};
これでテーブルを作成するためのマイグレーションファイルが完成です。
–table
既存のテーブルを対象にしたマイグレーションファイルを生成するオプションです。
sample_tableのカラム、nameの長さを150に変更するサンプルを示します。
php artisan make:migration modify_name_on_sample_table --table=sample_tableコマンド実行後出力↓

コマンドを実行すると、
/database/migrations/ 以下に
YYYY_MM_DD_HHmmss_modify_name_on_sample_table.phpが作成されます。
作成されたファイル↓
<?php

use Illuminate\Database\Migrations\Migration;
use Illuminate\Database\Schema\Blueprint;
use Illuminate\Support\Facades\Schema;

return new class extends Migration
{
    /**
     * Run the migrations.
     */
    public function up(): void
    {
        Schema::table('sample_table', function (Blueprint $table) {
            //
        });
    }

    /**
     * Reverse the migrations.
     */
    public function down(): void
    {
        Schema::table('sample_table', function (Blueprint $table) {
            //
        });
    }
};
このupメソッドに変更後を、downメソッドに変更前のカラムをセットします。
変更後↓
<?php

use Illuminate\Database\Migrations\Migration;
use Illuminate\Database\Schema\Blueprint;
use Illuminate\Support\Facades\Schema;

return new class extends Migration
{
    /**
     * Run the migrations.
     */
    public function up(): void
    {
        Schema::table('sample_table', function (Blueprint $table) {
            $table->string('name', 150)->comment('名前')->change();
        });
    }

    /**
     * Reverse the migrations.
     */
    public function down(): void
    {
        Schema::table('sample_table', function (Blueprint $table) {
            $table->string('name', 100)->comment('名前')->change();
        });
    }
};
これでテーブル構造を変更するマイグレーションファイルが完成です。
php artisan migration
php artisan migrate上記を実行すると、マイグレーションファイルに定義しているようにデータベースを更新します。
今回は、sample_tableを作成するサンプルをお見せします。
sample_table作成のマイグレーションファイルを作成後、コマンドを実行すると、

上記のような出力がされ、/app/database/migrations/
にあるマイグレーションファイルすべてが実行されます。
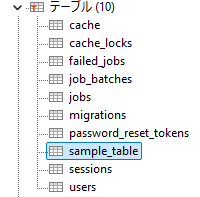
実際に接続されているデータベースを見ると、

しっかりテーブルが作成され、

構造もマイグレーションファイルに定義した通りとなっているのが分かります。
オプション
–seed
マイグレーション後にシード処理を再実行します。
seedを実行するための設定は、
をご覧ください。
seedを実行するための設定をした状態で、マイグレーションクラスとシーダークラスを準備し、
php artisan migration --seedを実行すると、テーブル作成と初期データの投入を同時に行います。
コマンド実行後出力↓

実行シーダークラス↓
<?php

namespace Database\Seeders;

use Illuminate\Database\Console\Seeds\WithoutModelEvents;
use Illuminate\Database\Seeder;
use Illuminate\Support\Facades\DB;

class SampleSeeder extends Seeder
{
    /**
     * Run the database seeds.
     */
    public function run(): void
    {
        DB::table('sample_table')->insert([
            'name' => 'taro',
            'email' => 'sample@example.com',
            'age' => 30,
        ]);
    }
}
実行後テーブル↓

–seeder
実行するシーダークラスを指定します。
特定のシーダークラスのみを実行します。
php artisan migration --seed --seeder=SampleSeeder上記を実行すると、SampleSeeder.classが実行され、
sample_tableにデータが投入されます。
コマンド実行後出力↓

–step
マイグレーションを個別に実行し、個別のロールバックを可能にします。


