
Eclipseにはクイックフィックス(ctrl + 1、cmd + 1)という
非常に便利な機能があります。
困った時はクイックフィックスを使用すれば、
なんとかなる場合が多いです。
クイックフィックスでできること
- ローカル変数の抽出
- 定数の抽出
- 修正候補の表示
- メソッドの抽出
それぞれの例を、プログラムではよくある
「Hello World!!」
を表示するプログラムを
Spring Bootで書いたものを基に紹介します。
package com.example.demo;

import org.springframework.boot.SpringApplication;
import org.springframework.boot.autoconfigure.SpringBootApplication;

@SpringBootApplication
public class HelloWorldApplication {

	/**
	 * @param args
	 */
	public static void main(String[] args) {
		SpringApplication.run(HelloWorldApplication.class, args);

		System.out.println("Hello World!!");
	}
}
ローカル変数の抽出
- 該当部分を選択
- ctrl + 1、cmd + 1
- ローカル変数の抽出を選択し、Enterキー
- 変数名の変更し、Enterキー
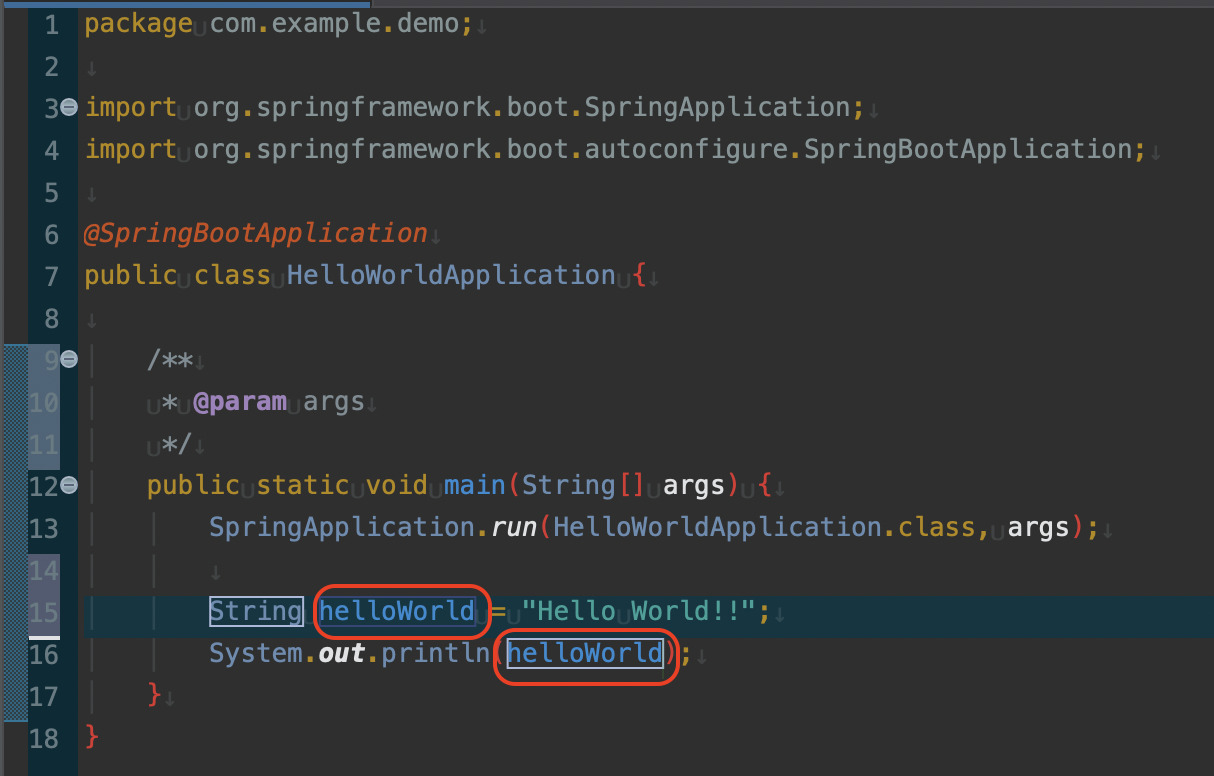
該当部部分の選択
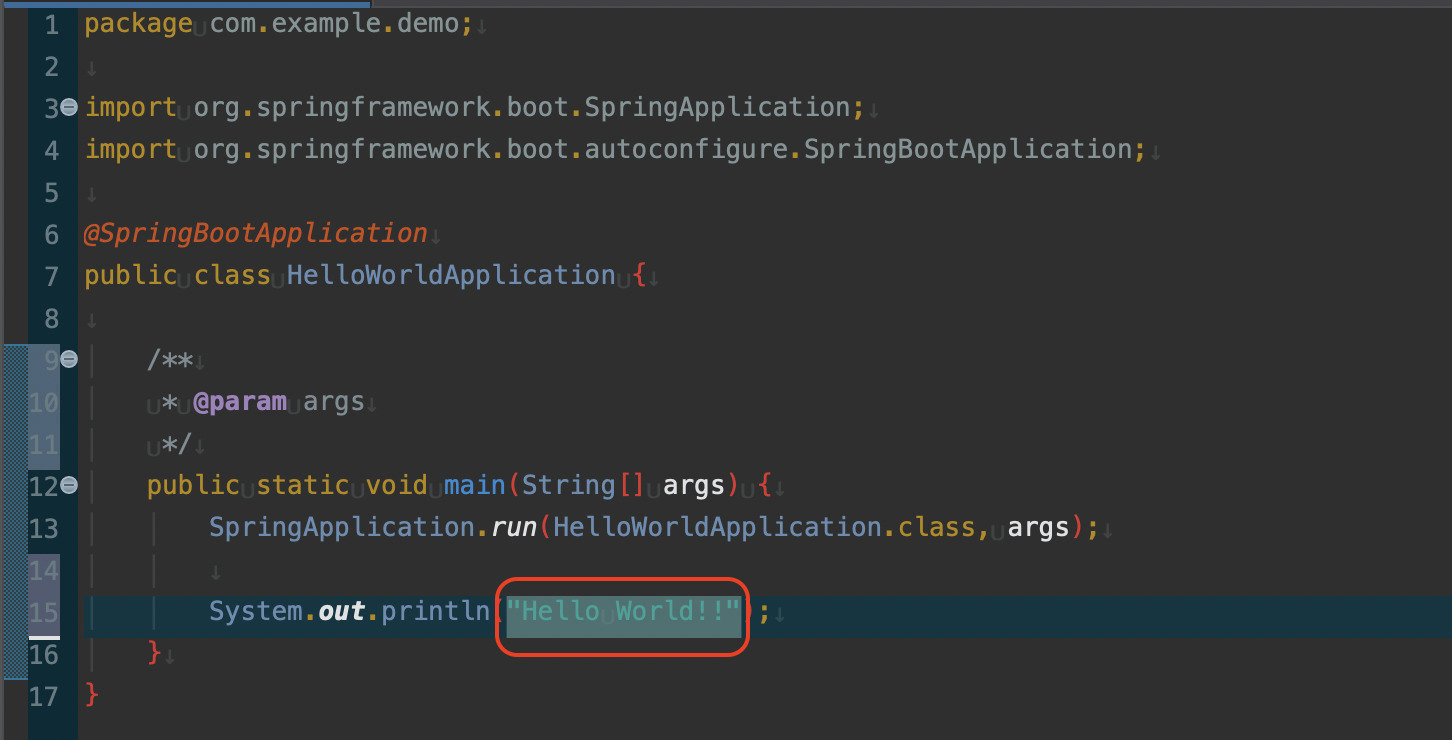
ctrl + 1、cmd + 1
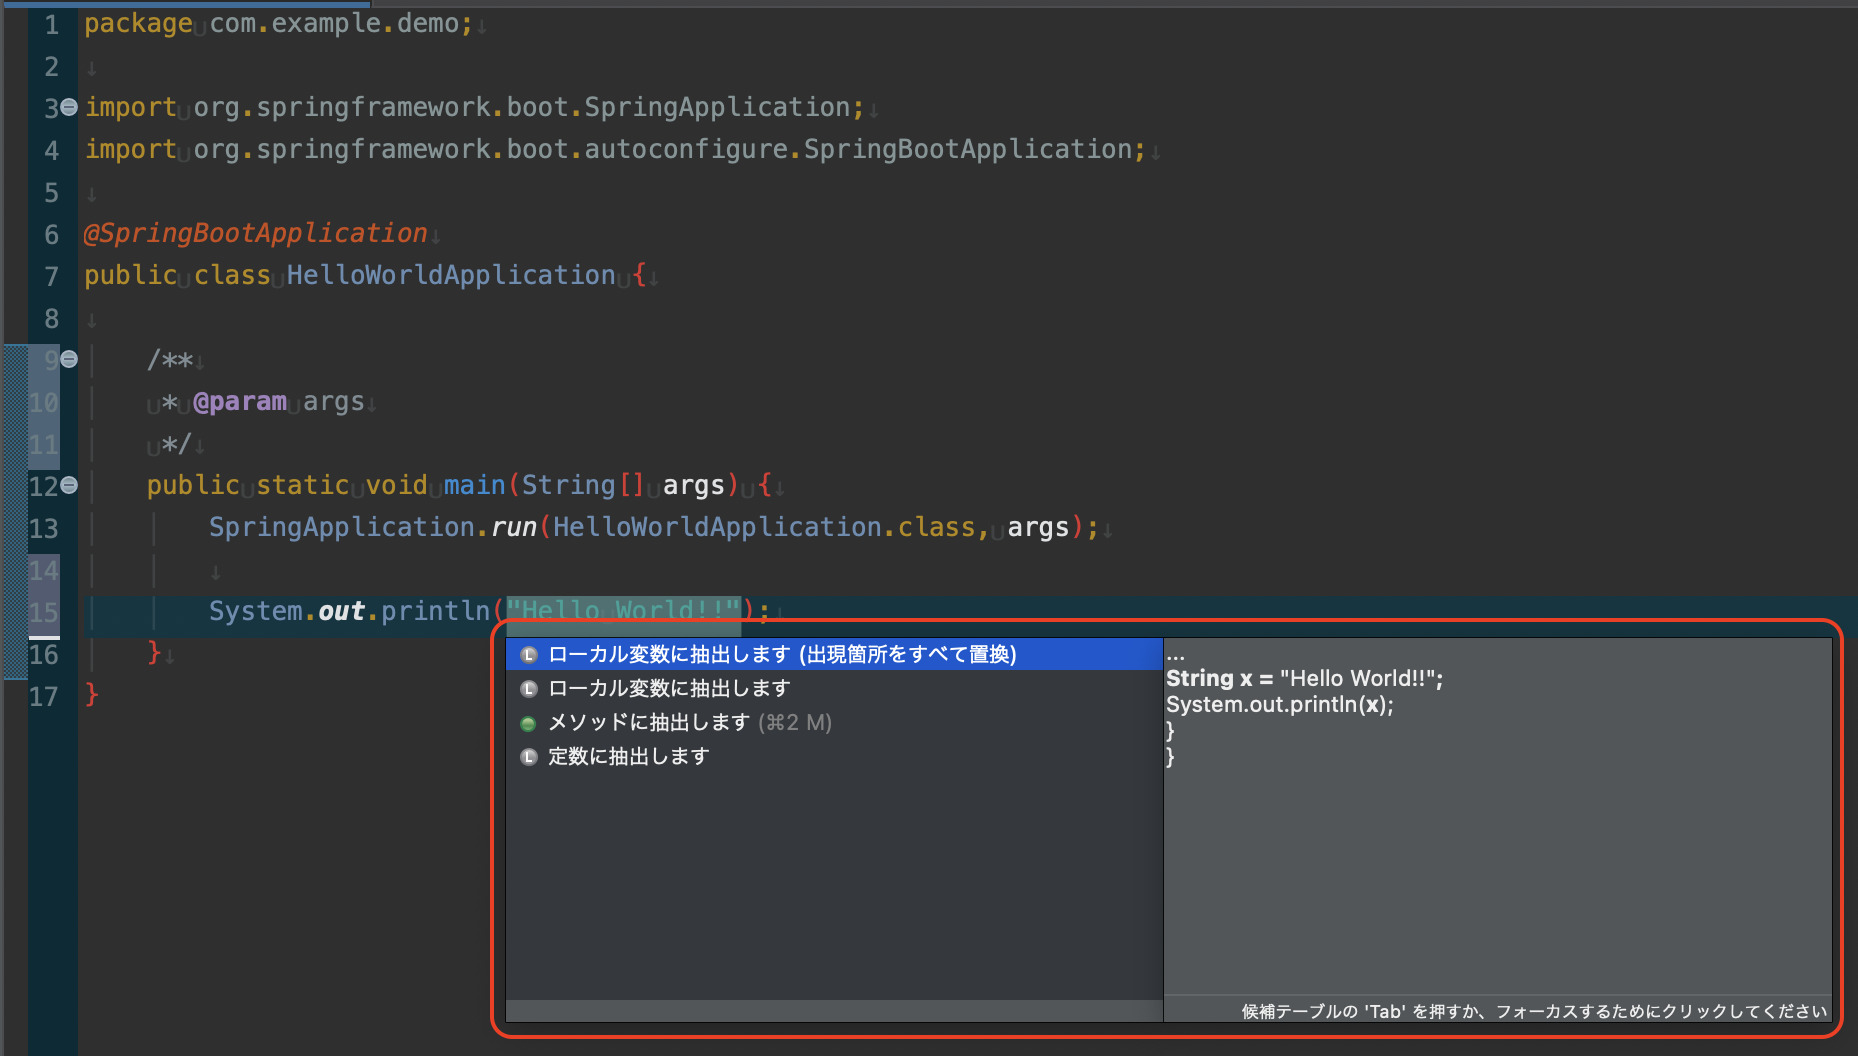
ローカル変数の抽出を選択し、Enterキー
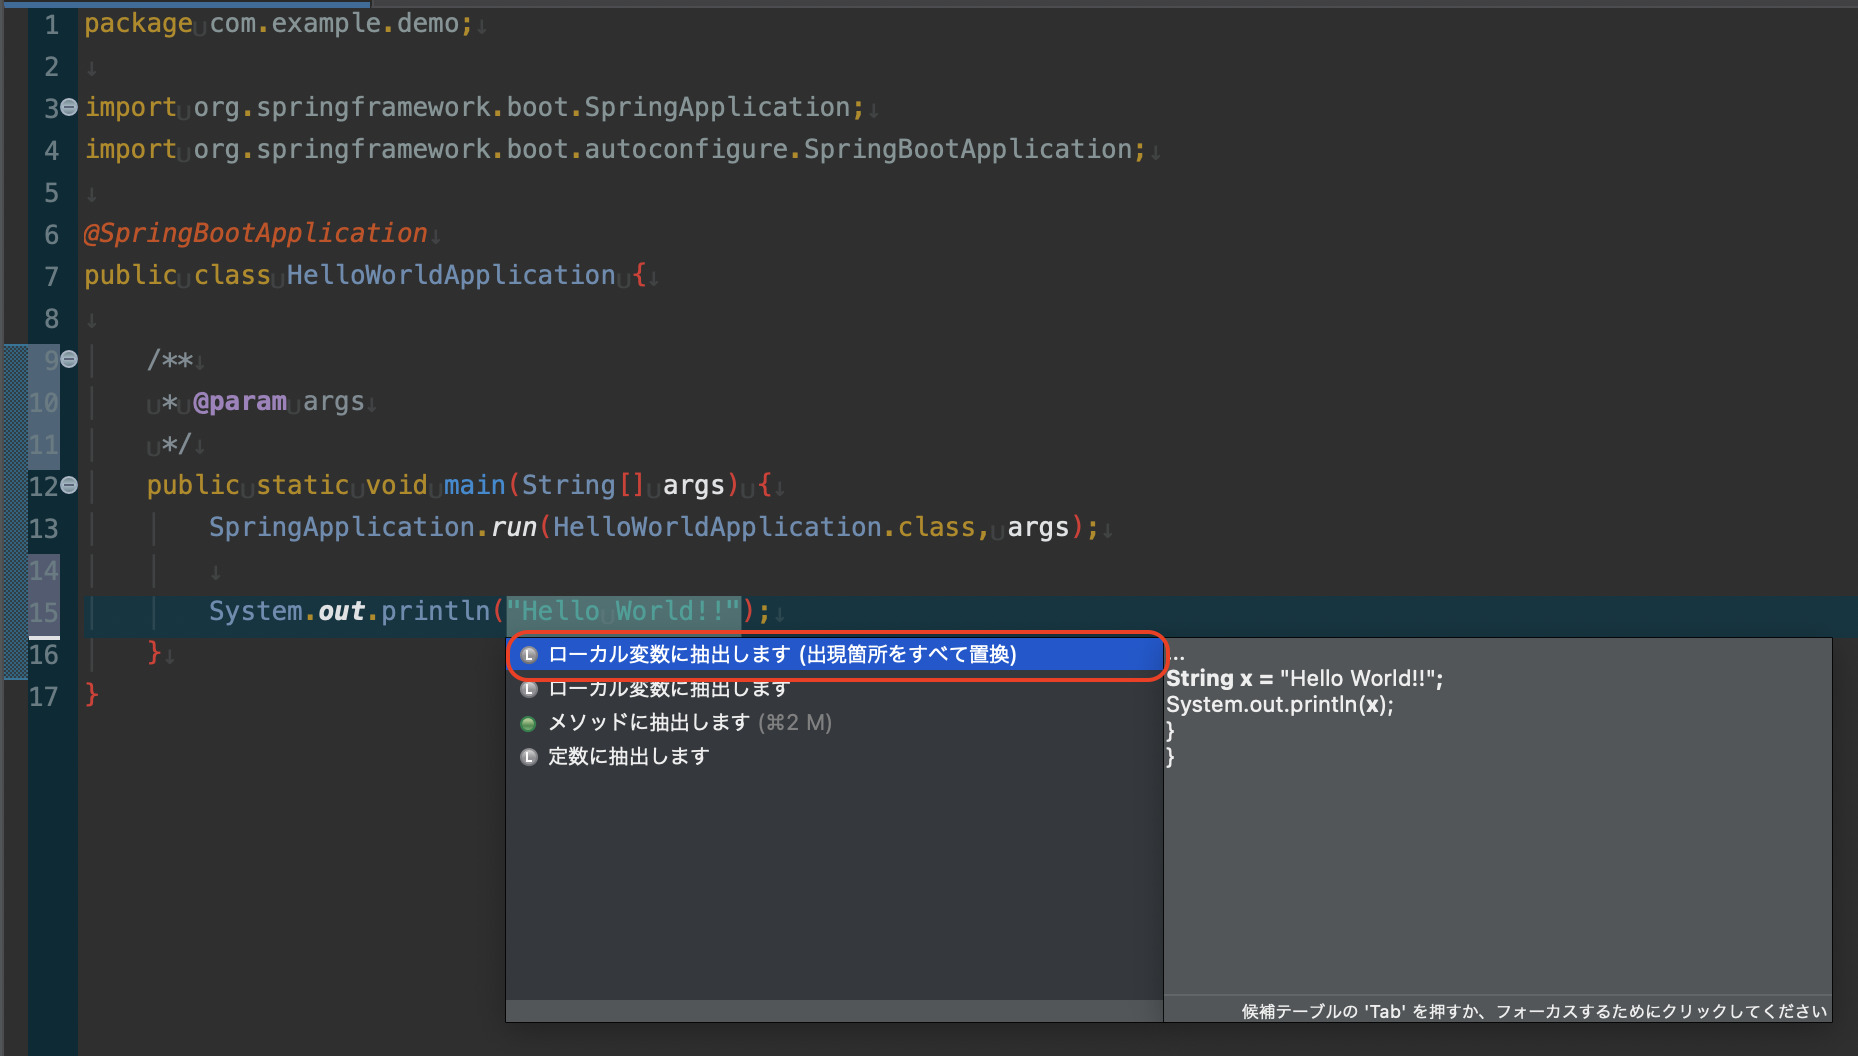
Enterキーを押すと以下のように、
選択範囲が使用されているメソッド内で使用できるように抽出されます。

変数名の変更
プルダウンに出ている変数名のところを選択します。
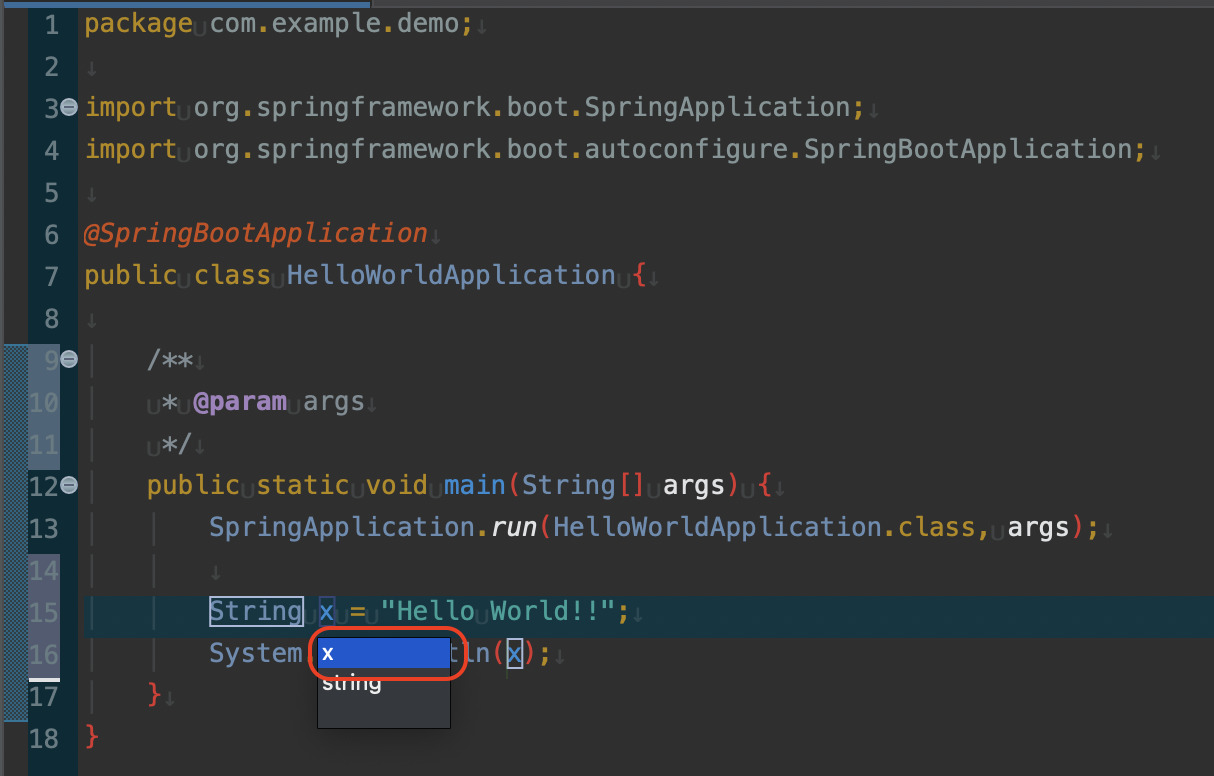
変数名のところが四角く囲われているのを確認します。

変数名を変更します。
Enterキーを押すと完了します。
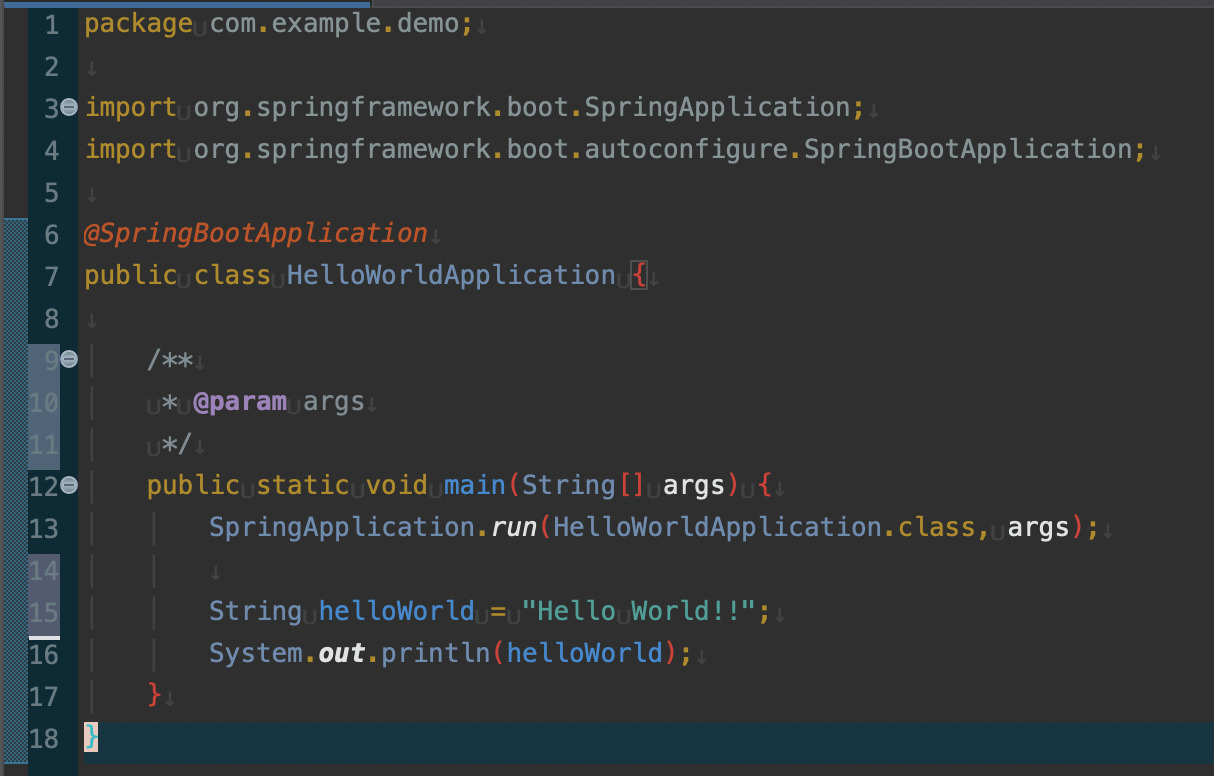
できたコード
package com.example.demo;

import org.springframework.boot.SpringApplication;
import org.springframework.boot.autoconfigure.SpringBootApplication;

@SpringBootApplication
public class HelloWorldApplication {

	/**
	 * @param args
	 */
	public static void main(String[] args) {
		SpringApplication.run(HelloWorldApplication.class, args);

		String helloWorld = "Hello World!!";
		System.out.println(helloWorld);
	}
}
定数の抽出
- 該当部分を選択
- ctrl + 1、cmd + 1
- 定数の抽出を選択し、Enterキー
- 変数名の変更し、Enterキー
該当部分の選択
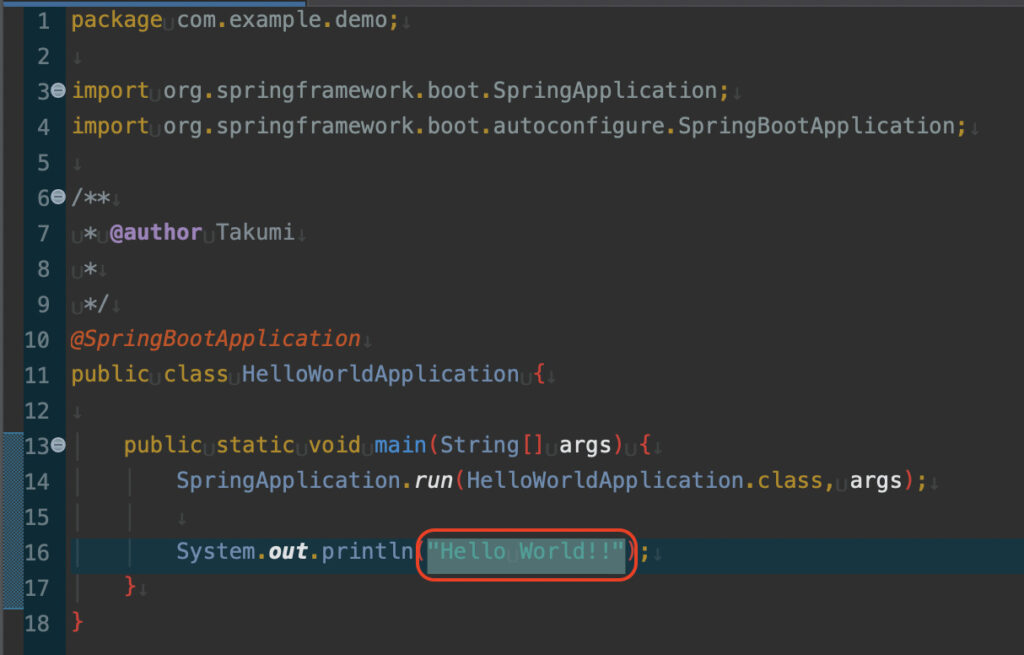
ctrl + 1、cmd + 1

定数の抽出を選択
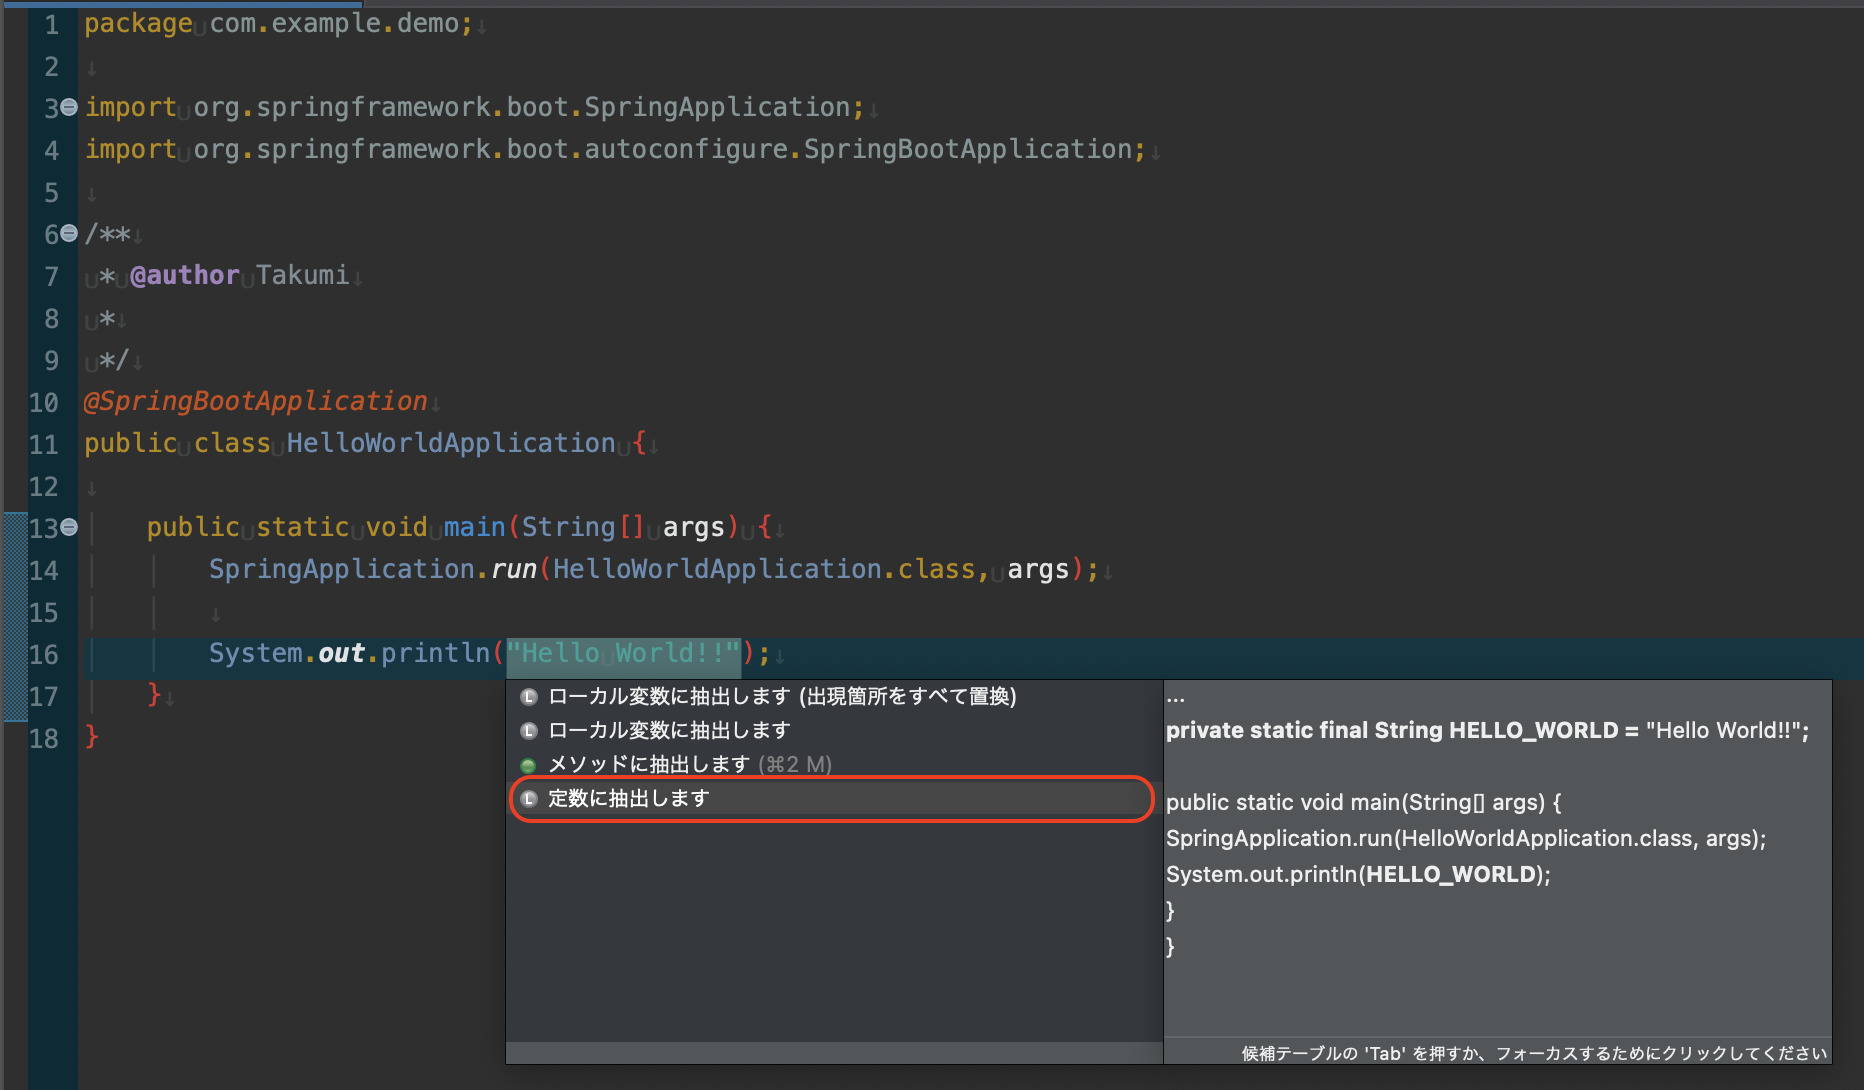
Enterキーを押す
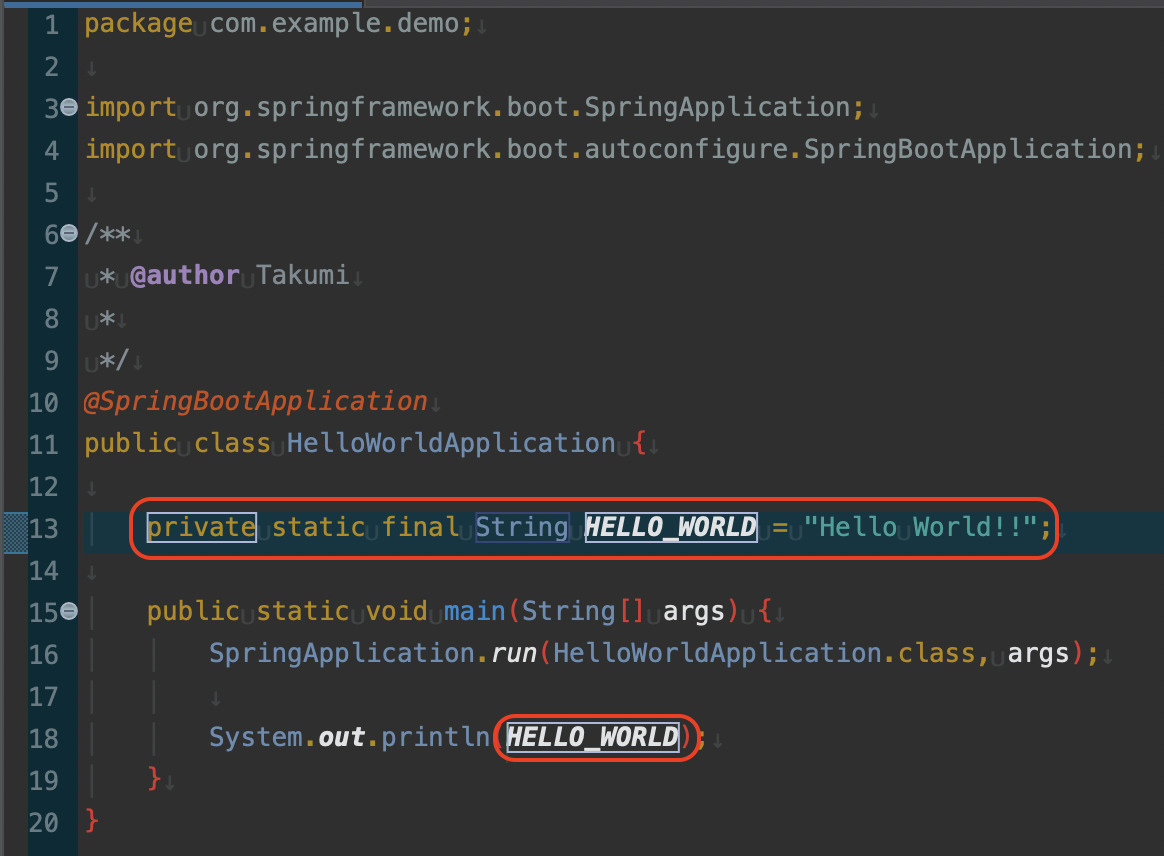
変数名の変更し、Enterキー
変数名を変更したい場合、そのまま入力すると変更される。
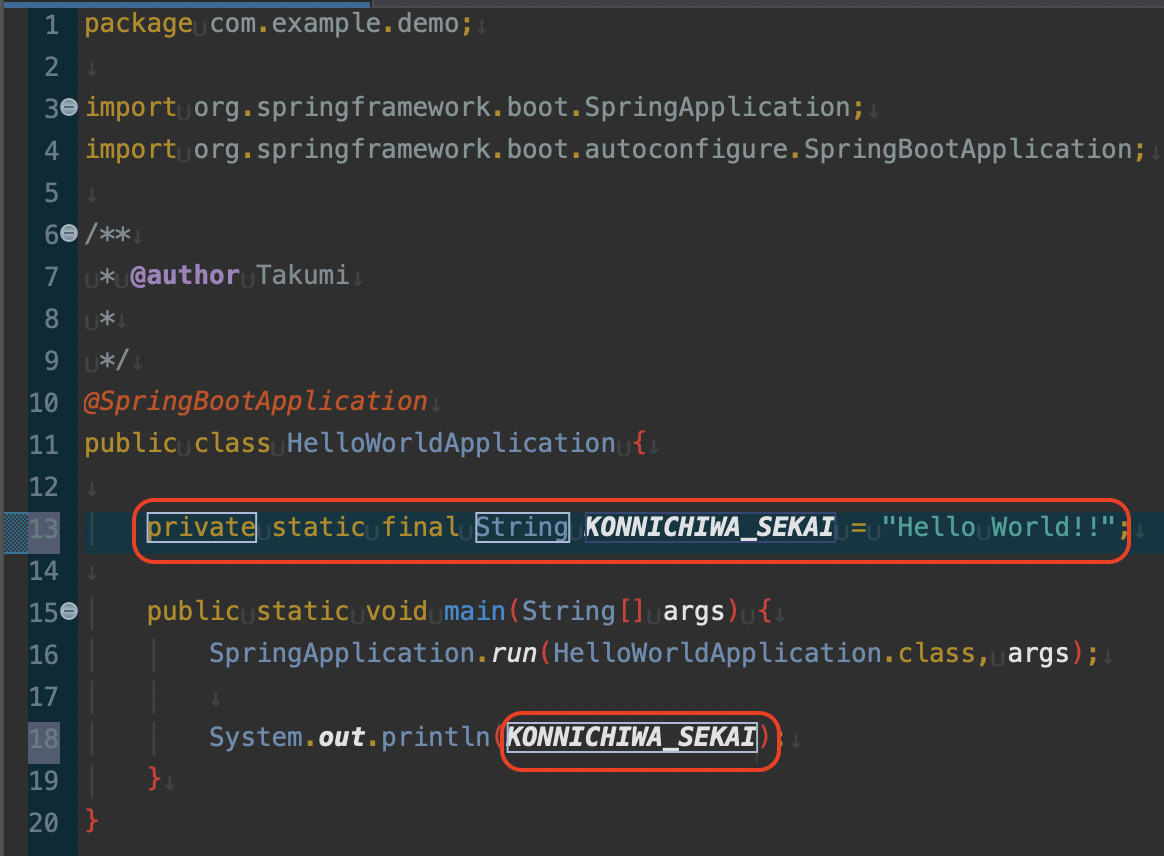
Enterキーを押すと完了

できたコード
package com.example.demo;

import org.springframework.boot.SpringApplication;
import org.springframework.boot.autoconfigure.SpringBootApplication;

/**
 * @author Takumi
 *
 */
@SpringBootApplication
public class HelloWorldApplication {

	private static final String KONNICHIWA_SEKAI = "Hello World!!";

	public static void main(String[] args) {
		SpringApplication.run(HelloWorldApplication.class, args);

		System.out.println(KONNICHIWA_SEKAI);
	}
}
修正候補の表示
よくある、左側の電球×印を押すと出てくるやつですね。
例えば、
System.out.prontln("Hello World!!");というような凡ミスをしたとしましょう。
誤)pront
正)print
ctrl + 1、cmd + 1を押します。
そうすると、
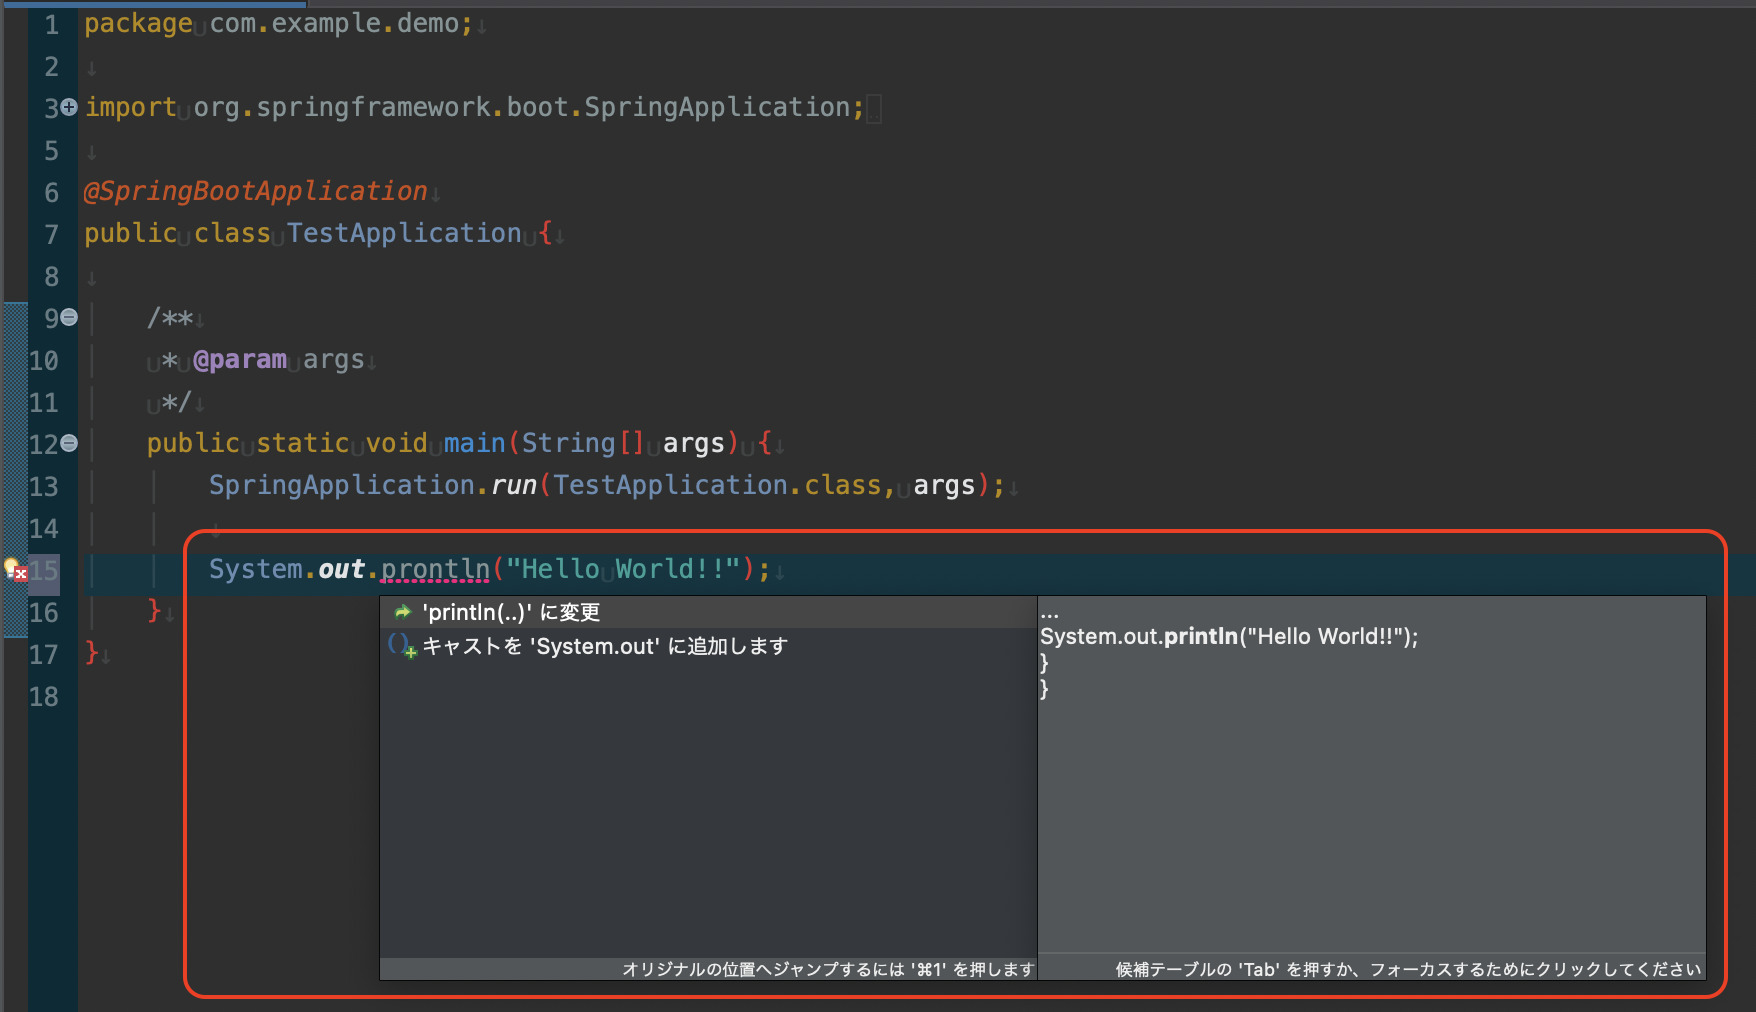
このように修正候補が出てくるので、
あとは修正したい候補があれば、そこに合わせて
Enterキーを押すのみ。
そうすると、簡単に修正されます。
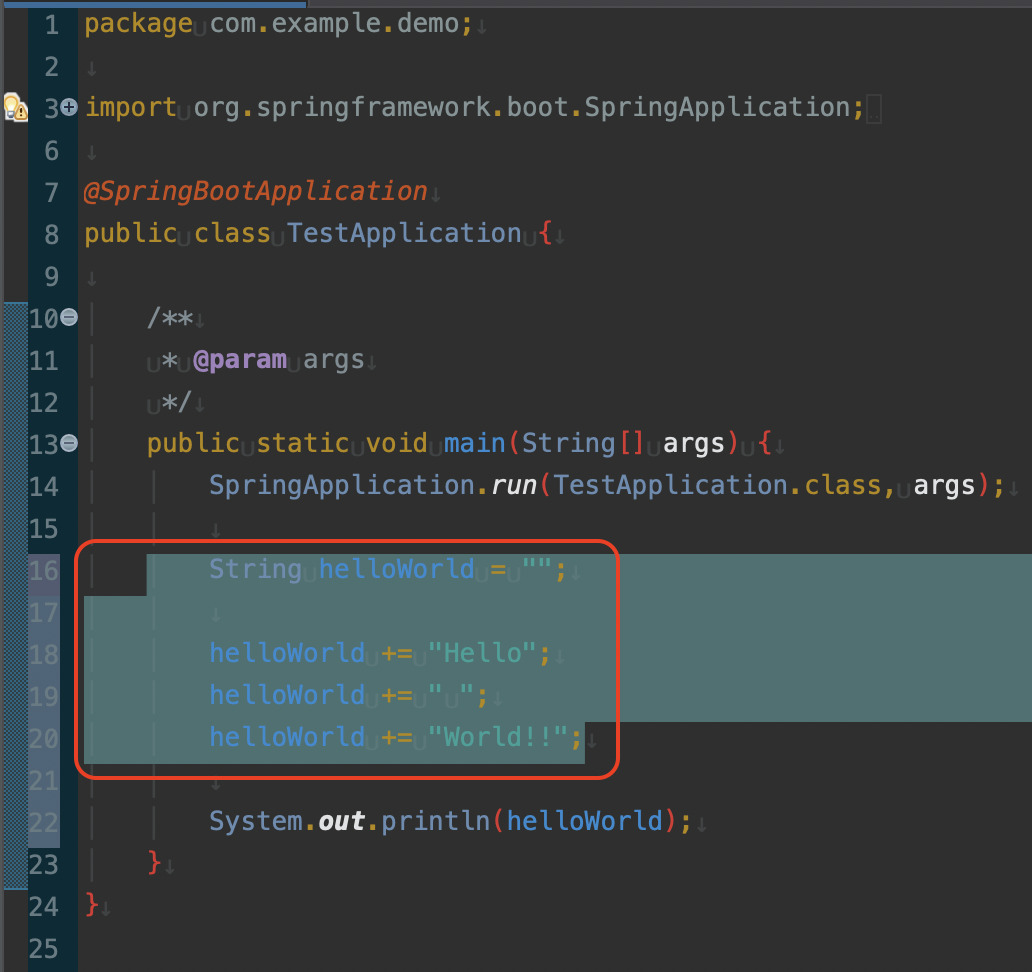
System.out.println("Hello World!!");メソッドの抽出
package com.example.demo;

import org.springframework.boot.SpringApplication;
import org.springframework.boot.autoconfigure.SpringBootApplication;
import org.springframework.data.relational.core.mapping.Embedded.Empty;

@SpringBootApplication
public class TestApplication {

	/**
	 * @param args
	 */
	public static void main(String[] args) {
		SpringApplication.run(TestApplication.class, args);

		String helloWorld = "";

		helloWorld += "Hello";
		helloWorld += " ";
		helloWorld += "World!!";

		System.out.println(helloWorld);
	}
}
上記のコードからメソッドを作成してみます。
操作方法はローカル変数を抽出の手順を
「メソッドを抽出」を選択するだけです。
そうすれば自動で戻り値も設定してメソッドを抽出してくれます。
抽出したい部分を選択
ctrl + 1、cmd + 1
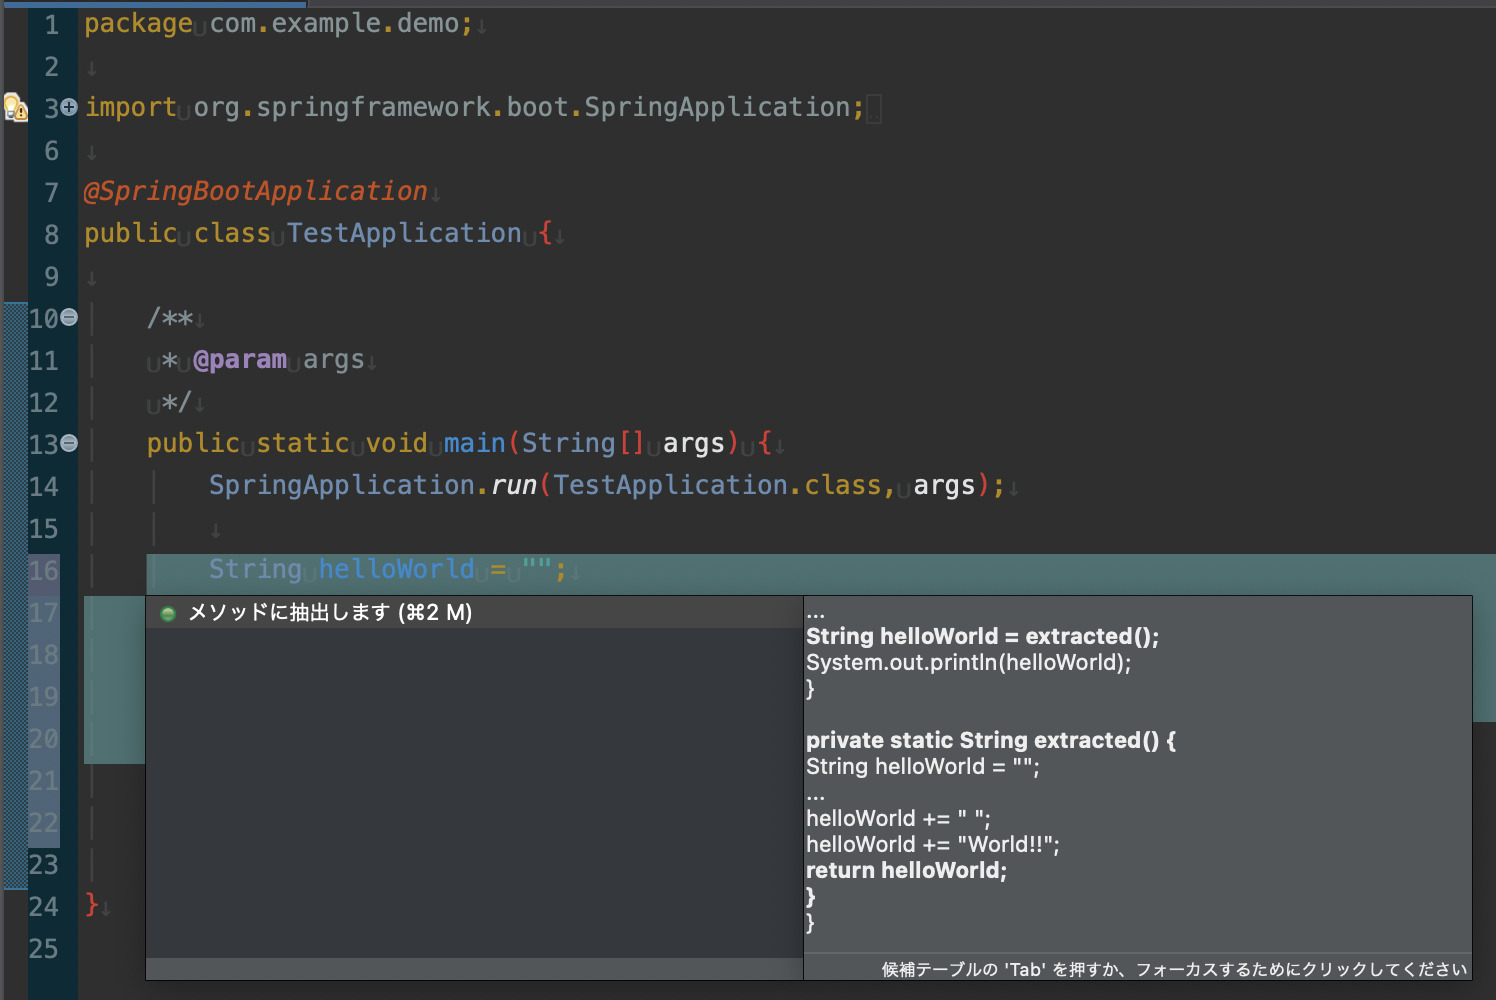

メソッド名を変更
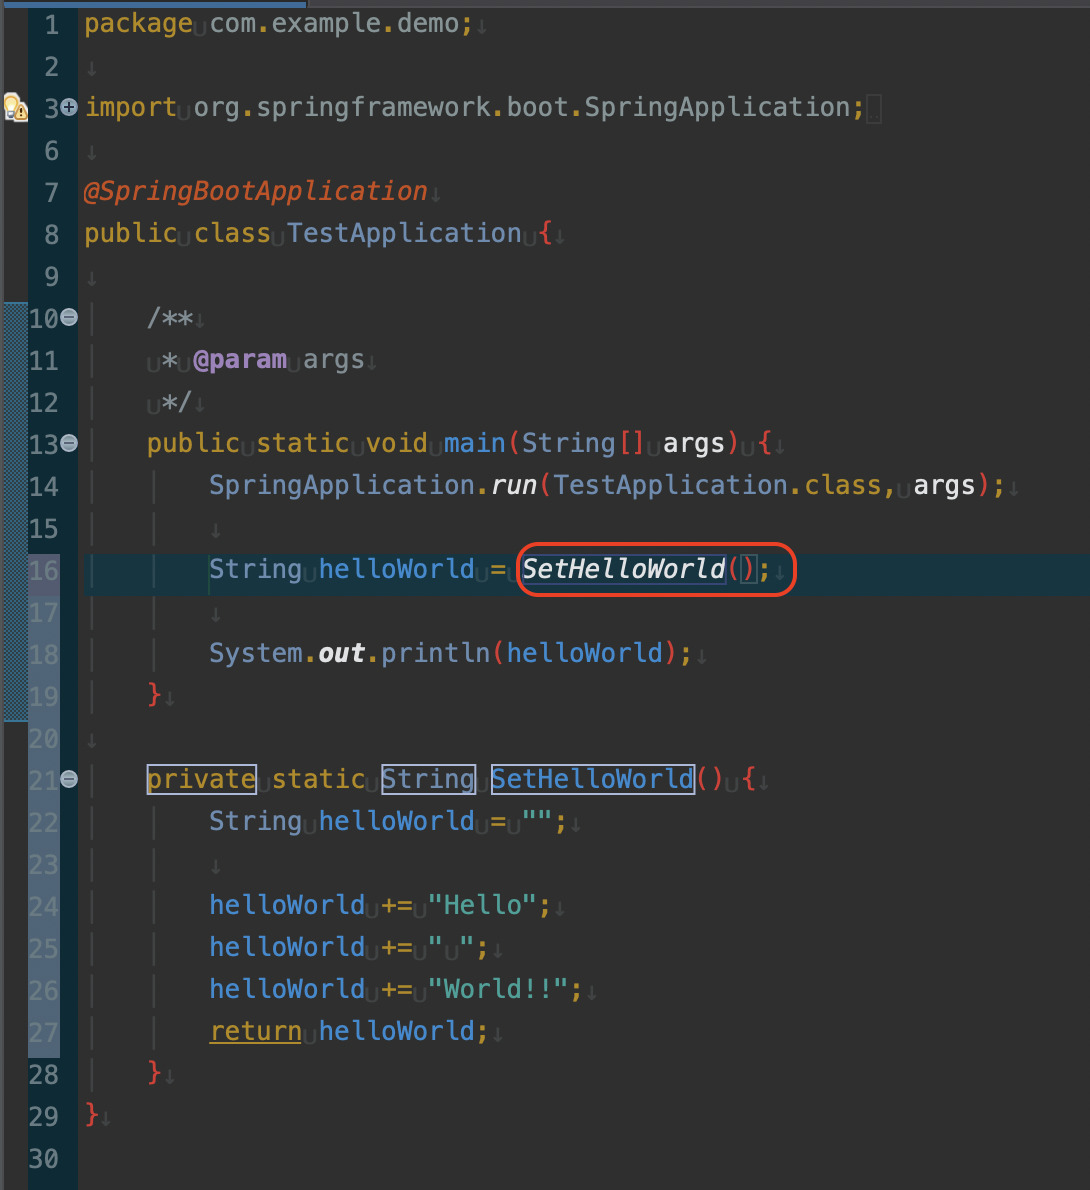
これで完了です。
できたコード
package com.example.demo;

import org.springframework.boot.SpringApplication;
import org.springframework.boot.autoconfigure.SpringBootApplication;
import org.springframework.data.relational.core.mapping.Embedded.Empty;

@SpringBootApplication
public class TestApplication {

	/**
	 * @param args
	 */
	public static void main(String[] args) {
		SpringApplication.run(TestApplication.class, args);

		String helloWorld = setHelloWorld();

		System.out.println(helloWorld);
	}

	private static String setHelloWorld() {
		String helloWorld = "";

		helloWorld += "Hello";
		helloWorld += " ";
		helloWorld += "World!!";
		return helloWorld;
	}
}
クイックフィックスは他にもいろいろなことができます。
困ったらとりあえず、ctrl + 1、cmd + 1を押しましょう!!